Blog

  • Blueberry Jam

    Blueberry Jam

    by Sandra Nickerson on Friday, April 2, 2010 at 8:14pm
    from Saving the Season

    BECKETT’S BLUEBERRIES

    2.5 lbs berries, about 8 cups

    1.5 lbs sugar, 3 heaping cups (I decided the straight 2:1 ratio suggested by the Blueberry Hill proprietor wasn’t enough to sweeten the berries to my taste)

    3″ cinnamon stick

    juice of 1/2 lemon

    1.5 tablespoon gin

    1 rinse and pick over berries to remove stems.

    2 put berries in a pot with a splash of water and heat gently until they start to sweat and soften. run the berries through a food mill, then return pulp to the pot and add sugar and cinnamon.

    3 bring to a boil and cook about 5 minutes until sufficiently thickened. stir in lemon juice and gin and return briefly to a boil. ladle into jars, seal and process in a boiling-water bath for 10 minutes.

    YIELD
    5 pounds berries yielded 4 pints
    4 x 8 oz
    8 x 4 oz

  • Lemon Meringue Cupcakes

    Lemon Meringue Cupcakes

    by Sandra Nickerson on Wednesday, March 31, 2010 at 4:26pm
    I love these cupcakes. I loved mixing them, filling them and making the meringues. Most of all, I loved eating them.

    The cake is moist and tender with a light lemon flavor from zest that is stirred into the batter. It is possible that lemon juice would have added to the intensity, but I don’t think that it would have been necessary since the cupcakes were filled with lemon curd. In fact, as you eat the cake, you will come across a bright burst of tart-sweet lemon in the center; more lemon flavor isn’t even necessary. The meringue makes a nice change from more traditional buttery frostings, too. It is light enough not to take away from the flavor of the cake, but it adds a bit of extra sweetness and a delightful look. And it also gave me an excuse to use my kitchen torch to brown the peaks.
    I used a cooked meringue for these, so they would stay stable at room temperature for several hours, though they can be finished and refrigerated for 24 hours. If you don’t have a small kitchen torch, just place the cupcakes on a baking sheet, top with meringue and put them under the broiler for about 3 minutes, until lightly browned.

    Lemon Meringue Pie Cupcakes
    1 cup cake flour
    1 cup all purpose flour
    2 tsp baking powder
    ½ tsp salt
    ¼ cup butter, very soft
    1 cup sugar
    2 tbsp lemon zest (from 2 large lemons)
    1 large egg
    1 tsp vanilla
    1 cup milk, room temperature
    Preheat oven to 375F. Line 18 muffin cups with paper liners.
    Sift together cake flour, ap flour, baking powder and salt in a medium bowl.
    In a large bowl, cream butter, sugar and lemon zest until fluffy, about 3 minutes. Beat in egg thoroughly, followed by vanilla. Alternate milk and flour in three additions, ending with flour.
    Evenly distribute in prepared pans.
    Bake at 375F for 18-20 minutes, until a tester comes out clean and the cake springs back when lightly pressed.
    Remove to a wire rack to cool.
    Makes 18 cupcakes.

    Once the cupcakes are cool, fill a metal-tipped pastry bag with lemon curd (recipe follows, or you may use store-bought) and pipe into cupcakes. Poke the tip of the pasty bag 1/2-1 inch into the top of each cupcake and squeeze about 2 tsp lemon curd into it. You might not use all the curd.

    Meringue Frosting
    3 egg whites
    ½ cup sugar
    ¼ tsp cream of tartar
    Set a glass or metal bowl over a sauce pan with an inch or two of boiling water in it (i.e. use a double boiler) and beat egg whites in it until foamy. Add in cream of tartar and beat until fluffy but not yet at soft peaks. Stream in sugar until meringue reaches fairly stiff peaks. Spread on cupcakes with a small knife or offset spatula.
    Brown with a blowtorch or place on a baking sheet under the broiler until lightly browned, about 3 minutes.

    Lighter Lemon Curd
    (adapted from Chocolate and the Art of Low Fat Desserts)
    1/3 cup fresh lemon juice
    1-2 tsp lemon zest
    5 tbsp sugar
    1 egg, room temperature
    1/2 tsp vanilla extract
    In a small sauce pan, over medium heat, dissolve sugar into lemon juice. Add zest.
    Lightly beat egg in a small/medium bowl. Whisking constantly, slowly pour lemon/sugar syrup into the egg. Beat for 2 minutes (only 1 if you’re using a mixer), then transfer back into the saucepan.
    Heat over low heat, stirring constantly, until it just starts to bubble at the edges. Remove from heat and stir in vanilla.
    Transfer to a small container and store in the fridge.
    Makes 2/3 cup.

  • Chocolate Chip Cookie Brownies

    Chocolate Chip Cookie Brownies

    by Sandra Nickerson on Tuesday, March 30, 2010 at 3:54pm
    Mix your favorite brownies, mix your favorite chocolate chip cookie dough. (Or buy them).
    Spread the brownie mix on the bottom layer in a parchment lined pan, drop the cookie dough by tablespoon on top of the brownie mix. Flatten the cookie dough into the brownies. Bake 350, 40 minutes… or until cake done.

    Perfection! Serve with coffee or even vanilla ice cream.

  • Chicken Enchiladas

    Chicken Enchiladas

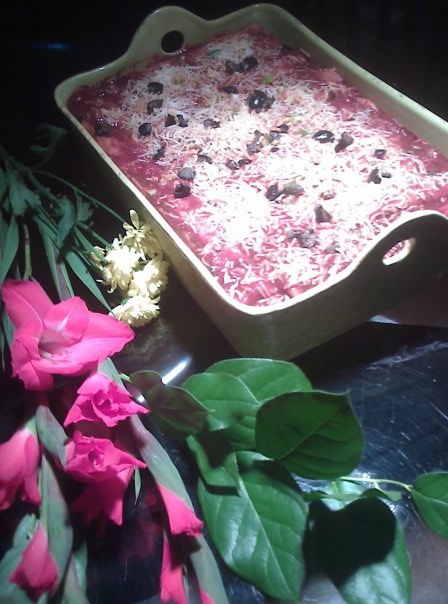
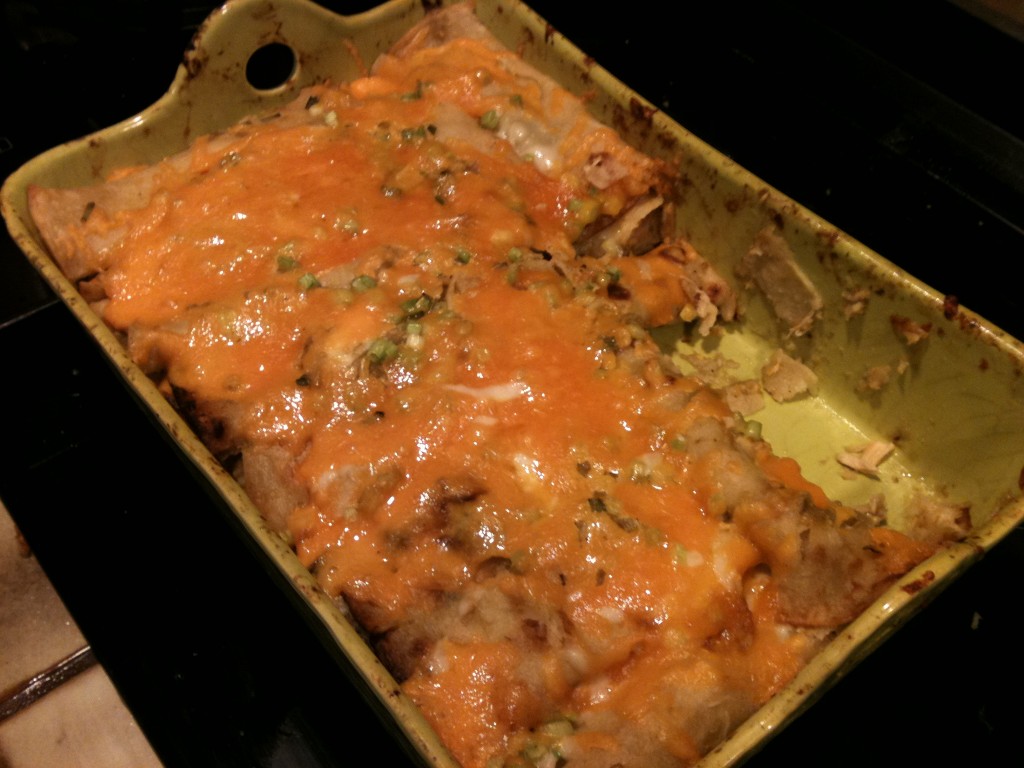
    Chicken Enchiladas are one of my favorites.

    I have my family well trained.  You can ask any of them, “what follows a roast chicken dinner?”  And they will all scream out – “Enchiladas”!  Yes, bake two chickens and you are now prepared and ready for wonderful enchiladas.

    Chicken Enchiladas

    by Sandra Nickerson on Tuesday, March 30, 2010 at 3:50pm
    1 baked chicken (mine was 6 pounds. You could buy 2 baked from Vons.)
    2 cans enchilada sauce (1 hot, 1 mild – I mix them) 
        Red or Green Sauce
    2 cups Mexican grated cheese or mild cheddar
    36 Corn Tortilla Shells
    1 can of black olives
    4 green onions chopped finely. (I use the white and the green)

    Shred the chicken and soak in half the sauce. Warm, then let it cool as you prepare the shells.
    Warm the other half of the enchilada sauce in a separate pan. Fry the shells, then dip them in the the sauce allowing the tortilla to soak up the flavor. Soak one at a time. (If you leave it in too long, it will fall apart.)
    Fill the soaked tortilla shell with sauced chicken, crumble an olive into it, spread some cheese over the top, and
    sprinkle a few onions. Then roll the tortilla, placing the opening on the bottom side so it stays closed. Assemble and arrange in your pan. (My pan will hold 2 deep, and 16 each layer.) Use your left over enchilada sauce to pour over the top, sprinkle with the last of the olives, cheese, and onion.
    Bake for 40 minutes at 350 degrees.

  • Making Easter Baskets

    Making Easter Baskets – Gardening – Spring Time

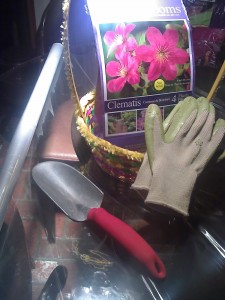
    Bag of Flower Bulbs
    Hand Shovel or Rake
    Gardening Gloves
    1 basket
    Cellophane and Ribbon
    A couple of handfuls of candy

    Potted Blooming Flower

    I included a jar of homemade jam to personalize my gift even more.
    Write on the ribbon, the name of the person you are giving the basket to, and I usually write
    e-bunny.

    Wrap with cellophane and a ribbon. Depending upon the number of baskets you are making, it helps to break up the tasks into smaller, more achievable goals.
    I will deliver my office baskets tomorrow.

    Happy Crafting!

    Easter Basket for the Gardener
  • Pear Butter with Cardamom

    Pear Butter with Cardamom

    Pear Butter with Cardamom

    by Sandra Nickerson on Saturday, March 20, 2010 at 10:27am
    10-12 Barlett Pears – Peel and dice
    6 Tablespoons Lemon Juice
    3 Cups White or Brown Sugar
    2 teaspoons Cardamom powder
    1 teaspoon salt

    Add lemon and sugar to diced pears and let sit for about an hour. You want juice to come out of the pears. Simmer on the stove and add the Cardamom powder and salt. Boil and still, cooking the mixture down until it is thick and the consistency you want. Use a stick blender to mash up the pears once they are falling apart. (I think it is best to let most of the juice cook out before you mash, because the thicker mixer is quicker to scorch.
    Taste and adjust seasoning.
    Can in water bath for 10 minutes.
    Very nice.

    Pear-Cardamom Butter

    Optionally: You can use orange juice for lemon, brown sugar instead of white and nutmeg instead of cardamom. And you can even use apples instead of pears. Have fun!

  • Baked Pears with Vanilla Ice Cream

    3 Tablespoons Walnut Oil or butter but remember the Walnut adds a richness that is exceptional.)
    6 Tablespoons Brown Sugar
    2 Pears: halved, cored, peeled
    1/2 C Chardonnay

    Mix ingredients in an oven proof pan or frying pan.
    Bake at 400 degrees for 20 minutes or fork tender.
    Baste several times with sauce.

    Serve with Vanilla Ice Cream

    Heaven, I am in Heaven

    Simple, Elegant, Delicious.

    Denny, I made the pears we did in the cooking class. You should definately try this recipe.
    Serves 4, but very easy to double or triple this recipe. Great for a crowd.

    If you have leftovers, serve over cottage cheese in the morning for breakfast.

  • Chocolate Torte – Flourless Cake

    Use the best chocolate you can afford.

    This cake is extremely rich, and tastes like the most delicious,
    silkiest, most supremely-chocolate ganache you’ve ever had which is also offered and sold by some of the leading online Cake Shops similar to Anges de Sucre cake shop. As
    mentioned, it’s equally good a few days later – in fact maybe better the next day.
    Use ScharffenBerger chocolate for this cake, you’ll appreciate it when you taste
    your first melt-in-your-mouth bite.

    10 ounces (290 g) bittersweet or semisweet chocolate, coarsely chopped
    7 ounces (200 g) butter, salted or unsalted, cut into pieces
    5 large eggs, at room temperature
    1 cup (200 g) sugar

    And any of the following options:
    1 T instant espresso/coffee or
    1 T vanilla or
    2 T Grande Marnier and 1 T Grated Orange Rind (Optional)

    Preheat the oven to 350F (175C).

    1. Butter a 9-inch (23 cm) springform pan* and dust it with cocoa
    powder, tapping out any excess. If you suspect your springform pan
    isn’t 100% water-tight, wrap the outside with aluminum foil, making
    sure it goes all the way up to the outer rim, you can also line the pan
    with parchment.

    2. Melt the chocolate and butter in a double boiler (or microwave),
    stirring occasionally, until smooth. Remove from heat.

    3. In a large bowl, whisk together the eggs and sugar, then whisk in
    the melted chocolate mixture until smooth.

    4. Pour the batter into the prepared springform pan and cover the top
    of the pan snugly with a sheet of foil. Put the springform pan into a
    larger baking pan, such as a roasting pan, and add enough hot water to
    the baking pan to come about halfway up to the outside of the cake
    pan.

    Bake for 1 hour and 15 minutes.

    You’ll know the cake is done when it feels just set, like quivering
    chocolate pudding. If you gently touch the center, your finger should
    come away clean.

    5. Lift the cake pan from the water bath and remove the foil. Let cake
    cool completely on a cooling rack.

    Serve thin wedges of this very rich cake at room temperature, with
    creme anglaise, ice cream, or whipped cream.

    Storage: This Chocolate Cake can be wrapped and chilled in the
    refrigerator for 3-5 days.

  • Stuffed Mushrooms – Steak, Cheddar and Creamy Horseradish

    4 Portabello Mushroom Caps (cleaned)
    5 oz steak sliced thinly
    Cheese- A mixture is always good: cheddar, parmesan, pepper jack
    touch of creamy horseradish or Onion Marmalade – garnish tops with a bit of carmelized onions.

    Baked stuffed mushrooms, are an easy dish to prepare an cook. It will take approximately 25 minutes to complete, depending on what You stuffed the mushrooms with, it may take a little longer. The best thing about mushrooms is they make a perfect little container for Your other favorite ingredients. There is an endless combination of what You can stuff a mushroom with. You can even stuff a mushroom with other mushrooms, there is so many options when using mushrooms, from taste to flavor, to that special texture mushrooms are are a dish to behold.

    This recipe of baked stuffed mushrooms is My favorite, You can always substitute, for Your favorite ingredients an mushrooms to get that taste You enjoy. You can keep it plan with some cheese, or overdue it with egg, steak an cheese. A good combination, that plays on each ingredient taste, will create a to die for side dish.

    Preheat Oven 400F. Add 1 tablespoon olive oil to skillet, cook steak on skillet, until brown. As the steak is cooking add Your favorite cheese, I used American, Brie an Mozzarella Mix well. You will want to lightly clean the mushrooms with a damp cloth, Trim there stalks, Put the mushrooms into a bowl, add olive oil, salt, pepper, an paprika (or Your favorite spice). Toss lightly. Place mushrooms on a flat pan cap side down. Remove steak an cheese from skillet add to each mushroom top, Sprinkle grated Parmesan on each. Place in Oven for 20 – 25 minutes or until mushrooms are crisp. Serve

    This recipe is very flexible, it is best to use Your favorites. Their is so many types of mushrooms an a flavor for everyone. You can stuff a mushroom with almost anything, it’s good to keep Your mind open to to the many options You have when making this mushroom dish.

  • Rice Krispies Treats

    I think my husband grew up on these.  His mom continued to make them for my kids.  Always a hit.  You can kick them up by adding chocolate chips or
    warming the chocolate and drizzling it over the top. 
     Kellogg’s® prints the recipe for Rice Krispies Treats® on every box of Kellogg’s Rice Krispies®. The basic recipe for Rice Krispies Treats® has changed very little over the years. Oh, some of us now prefer to use butter, in place of margarine, and we may tinker a little with the ingredients, but its original flavor and texture are still there.  Some prefer to use miniature marshmallows, large ones are fine, or you can even use a 7 ounce jar of marshmallow creme. But it is important to use fresh marshmallows as they melt so nicely, and make sure to butter or spray, with a non stick vegetable spray, the baking pan, the saucepan, the bowl, and all utensils, as this mixture is very sticky. These treats are definitely at their best when freshly made, although they can be stored for a few days at room temperature.

    Rice Krispies Treats®: Butter, or spray with a non stick vegetable spray, a 9 inch (23 cm) square baking pan.

    Place the Rice Krispies® in a large bowl that has been buttered.

    Butter, or spray with a non stick vegetable spray, a heavy medium sized saucepan. Melt the butter and salt in the saucepan over medium low heat. Add the marshmallows and constantly stir until the marshmallows have completely melted. Add the vanilla extract and then pour the mixture over the Rice Krispies® cereal and stir until all the cereal has been coated.

    Immediately pour the mixture into your prepared pan and lightly pat until even. Cool at room temperature until the Rice Krispies Treats® have set. Cut into squares. Can store at room temperature for a few days if well wrapped

    Makes about 16 squares.

    Sources:

    Rice Krispies Treats, Rice Krispies and Kellogg’s are trademarks of Kellogg’s NA Co.

    Rice Krispies Treats®:

    6 cups (150 grams) Rice Krispies® cereal

    3 tablespoons (42 grams) unsalted butter or soft natural buttery spread*

    1/8 teaspoon salt

    1 – 10 ounce (285 grams) package miniature marshmallows

    1/2 teaspoon pure vanilla extract

    * I like to use either Smart Balance® or Earth Balance®

    ®Smart Balance and ®Earth Balance are registered trademarks of Smart Balance Inc.

    To make these perfect for company, dip into dark and white chocolate half and half.
    Pretty and tempting.