Blog

  • Smoked Fish – Shad, Trout or Salmon

    Smoked Fish – Shad, Trout or Salmon


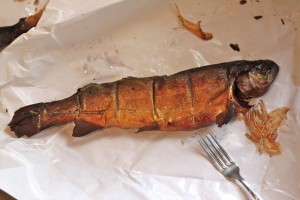
    Both my parents enjoyed fishing, but it was my Dad that built a small smoke house in the backyard. After a successful day of fishing, he would clean and fillet his catch and set about smoking the fish. I remember eating smoked shad as a kid. I loved the smoky, salty taste of the fish. He would serve me a piece of smoked shad fillet on a piece of newspaper and for a kid the best part was picking out all those bones with your fingers and eating the bits of meat.

    Since we grew up near the San Joaquin Delta River, much of our fish was fresh water, but there were times I remember the whole house being awaken in the middle of the night when my parents would return home from a day fishing boat out of San Francisco, and everyone would be called upon to scale and clean fish. I loved those nights. My Mom and Dad would be in the best moods, and to see the bounty of fish was amazing. There were gunnysacks full of seafood. The boys would carry the sacks full of sea smells just outside the back porch where a light would be jeririgged. The sacks were poured out and the bounty that tumbled out was like opening a surprise package. Out popped many rock fish, crabs still alive from their journey. I think the other fishermen on the boat that didn’t want their fish, sent it home with my parents who were more than willing to accept this generousity with 9 kids at home.

    I was probably 7 or 8 years old, and remember seeing my first LingCod, Red Snapper and playing with the crab and listening to my Mom’s warning to be careful about the pinchers. My Mother’s laughter was the best music during these years. While I do not have my Dad’s recipe for his brine, I did find an interesting one at HUNTER, ANGLER, GARDENER, COOK.

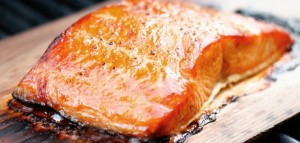
    Oily fish are good smoked; along with Shad the largest of the herring family, don’t forget trout, salmon and tuna.

    Awesome Bite Smoked Tuna!

    BRINE 1 (30 minutes)
    â– 1 cup kosher salt
    â– 2 quarts water

    BRINE (8 to 24 hours)
    â– 1/2 cup salt
    â– 2 quarts water
    â– 1/2 cup maple syrup
    â– 1 chopped onion
    â– 3 smashed garlic cloves
    â– Juice of a lemon
    â– 1 tablespoon cracked black pepper
    â– 1 tablespoon fennel seeds
    â– 2-3 crushed dried hot chiles
    â– 5 bay leaves
    â– 2 cloves
    â– 1 teaspoon crushed coriander seeds
    1.Mix the first brine together and soak the shad fillets in it for 30 minutes, then drain.
    2.Meanwhile, bring the second brine to a simmer, stir well to combine and turn off the heat. Set this in a drafty or cool place to chill it down fast.
    3.When the second brine is cool, pour it over the shad and brine for 1-2 hours.
    4.Drain and rinse off the fillets, then pat dry with a towel. Air dry in a drafty place — use a fan if need be — for 2-3 hours, or until the meat looks a bit shiny. This is an important step; you are creating a sort of a second skin called a pellicle that is necessary to seal the fillets. If you skip this step, you will have problems with the proteins leaking out from between the flakes of the meat, forming a white icky stuff that will need to be scraped off.
    5.Smoke over hardwoods for 1-3 hours, depending on the heat. You want the shad to slowly collect smoke, and cook very slowly. Under no circumstances do you want the heat to get above 180 degrees.
    6.Remove and let cool at room temperature before packing away in the fridge or freezer.

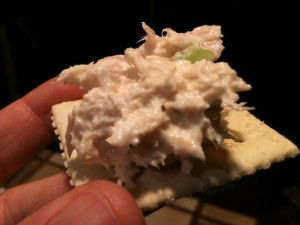
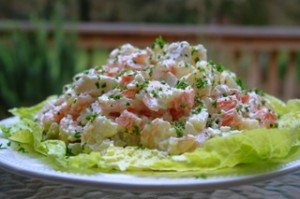
    This is a great weekend project. The trout at Costco have been calling my name. I think they are heading for the smoker this weekend. Saltine crackers with a dollop of smoked shad salad, which might include diced onion, mayo, seasoning, lemon juice, and a pinch of chopped parsley. Sooo good! Awesome bite!

    By the way, if you don’t have fresh smoked fish and have the craving, open a can of white albacore tuna for the salad above, but add a dash of smoke flavoring. I think I’ll go make some right now.

    Thanks Dad for the great memories!
  • Coeur a la Creme with Raspberry Sauce

    Coeur a la Creme with Raspberry Sauce

    Ingredients

    12 ounces cream cheese, at room temperature
    1 1/4 cup confectioners’ sugar
    2 1/2 cups cold heavy cream
    2 teaspoons pure vanilla extract
    1/4 teaspoon grated lemon zest
    Seeds scraped from 1 vanilla bean
    Raspberry and Grand Marnier Sauce, recipe follows
    2 half-pints fresh raspberries
    Directions
    Place the cream cheese and confectioners’ sugar in the bowl of an electric mixer fitted with the paddle attachment and beat on high speed for 2 minutes. Scrape down the beater and bowl with a rubber spatula and change the beater for the whisk attachment. With the mixer on low speed, add the heavy cream, vanilla, lemon zest, and vanilla bean seeds and beat on high speed until the mixture is very thick, like whipped cream.

    Line a 7-inch sieve with cheesecloth or paper towels so the ends drape over the sides and suspend it over a bowl, making sure that there is space between the bottom of the sieve and the bottom of the bowl for the liquid to drain. Pour the cream mixture into the cheesecloth, fold the ends over the top, and refrigerate overnight.

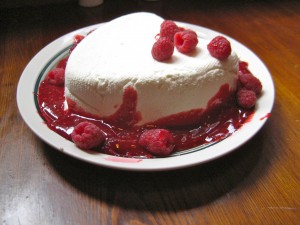
    To serve, discard the liquid, unmold the cream onto a plate, and drizzle Raspberry and Grand Marnier Sauce around the base. Serve with raspberries and extra sauce.

    Raspberry and Grand Marnier Sauce:

    1 half-pint fresh raspberries

    1/2 cup sugar

    1 cup seedless raspberry jam

    2 tablespoons orange-flavored liqueur (recommended: Grand Marnier)

    Place raspberries, sugar, and 1/4 cup water in a small saucepan. Bring to a boil, lower the heat, and simmer for 4 minutes. Pour the cooked raspberries, the jam, and orange liqueur into the bowl of a food processor fitted with the steel blade and process until smooth. Chill.

    If your unmolding isn’t perfect, scoup the creme on top of the raspberry sauce using dainty little tea cups!

  • Black Walnut Cake – Happy Valentine’s Day

    Black Walnut Cake – Happy Valentine’s Day

    Happy Valentine’s Day

    Ingredients
    1 cup butter, softened
    1/2 cup shortening
    3 cups sugar
    5 eggs
    3 cups all-purpose flour
    1/2 teaspoon baking powder
    1 teaspoon ground cinnamon
    1 teaspoon ground cardamom
    1/2 teaspoon ground nutmeg
    1 cup milk
    1/2 teaspoon vanilla extract
    1 cup chopped black walnuts
    Zest from 1 Orange

    Directions
    1.Preheat the oven to 325 degrees F. Grease and flour a 10 inch tube pan.
    2.In a large bowl, cream together the butter, shortening, and sugar until light and fluffy. Beat in the eggs one at a time, mixing just until the yellow disappears. Combine the flour, baking powder, and cinnamon; stir into the creamed mixture alternately with the milk. Stir in the vanilla and walnuts, and pour into the prepared pan.
    3.Bake for 1 hour and 30 minutes, or until a knife or toothpick inserted into the crown comes out clean. Cool in the pan for about 15 minutes before turning out of the pan onto a wire rack to cool completely.

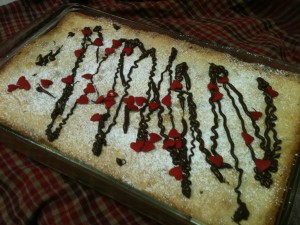
    Top with Chocolate Genache or Whipped cream made using the the Power Whip and Drizzle warm chocolate chips and your favorite sprinkles: Valentines, etc…
    Depending upon the size cake or cupcake you will probably cook somewhere between 18 minutes and 40 for a full size cake.
    325 degree oven.

    Be sure to try this recipe, it is really is one of my favorites. It reminds me of the amazing cakes we get from BUTTER + CREAM BAKERY all the time.

  • Best French Toast, Ever

    Best French Toast, Ever

    Blueberry and Blackberry Sauce

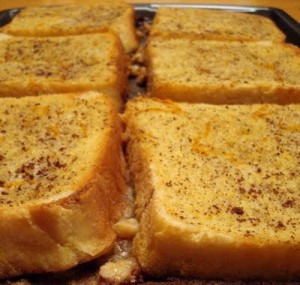
    This is a breakfast fit for a King, I mean husband.  Serve my wonderful daughter breakfast in bed.  She woke up happy.    Adapted from Robert Quarry’s recipe book “Simply Wonderful Recipes for Wonderfully Simple Foods”.  Dennis came across a few cookbooks at an auction, and I love this guy’s book.  It is wonderful little paperback.

    8-12 slices thick bread – 1 inch thick, Texas Toast

    4 eggs beaten

    1 cup half and half

    1/4 tsp salt

    1/2 tsp nutmeg

    1/2 tsp cinnamon

    1/2 tsp cardamom

    1/2 tsp real vanilla extract

    Butter or margarine

    Heat oven to 400 degrees.  Beat eggs and seasonings and half and half together.

    Dip bread slices in egg mixture and place in glass baking dish.  Pour remaining egg mixture over bread and allow to absorb all.

    Fry bread slices in butter until golden brown turning only once. Drain on paper towels.  Then place in baking dish in 400 degree oven and allow to puff up, about 5 minutes. 

    If needed drain again on paper towels.

    Serve immediately with powdered sugar and one or more of the following sauce toppings.  

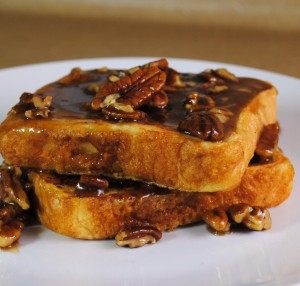
    Butter Pecan Topping

    ½ cup butter
    ½ cup brown sugar
    1 tsp vanilla
    1 cup chopped pecans
    Extra halves for garnishing

    Combine all ingredients in saucepan until melted together. Serve over French Toast. 

    Raspberry Coulis

    1 cup raspberries

    1/2 lemon juice

    powdered sugar to taste

    Blend until smooth, then drizzle on top of french toast. If you do not like seeds, don’t forget to strain.

    Or

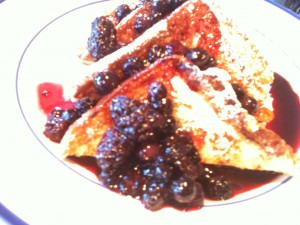
    Blueberry and Blackberry Sauce

    3 T balsalmic vinegar

    1 cup blueberries

    1/2 cup blackberries

    1/2 cup brown sugar

    1/2 cup maple syrup

    juice of 2 lemons

    2 T butter

    Mix together in a saucepan, allow to simmer to reduce. This sauce will thicken as it cools.  Remove from heat and add the butter.

    Or

    Chocolate Sauce:  Drizzle a small amount of Chocolate Sauce over the french toast.

    Your guests can choose their own toppings:  Butter Pecan, Raspberry Coulis, Blueberry/Blackberry Sauce and/or Chocolate Sauce.  They will feel they have died and gone to heaven. 

    Don’t forget to serve with bacon and hot coffee.

    This makes a wonderful Valentine’s Day Brunch or Mother’s Day Brunch.

  • Zucchini Bread

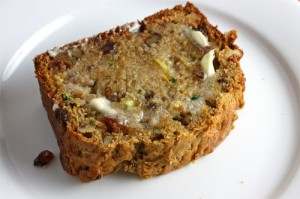
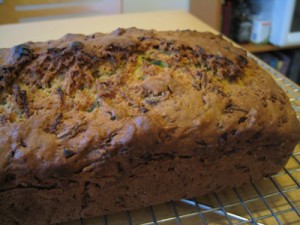
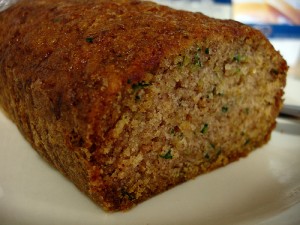
    Zucchini Bread

    3 eggs well beaten

    1 1/2 cups sugar

    3 tsp vanilla

    1 cup oil

    2 cups shredded zucchini

    3 cups all purpose flour

    1/2 tsp baking powder

    1 tsp salt

    3 tsp cinnamon

    1 tsp baking soda

    1 cup chopped walnuts

    Beat egg until light and fluffy. Add sugar, vanilla, oil, blend well. Stire in grated zucchini.  Sift flour, baking powder, salt, baking soda and creamed mixture, fold in nuts.  Turn into greased and floured loaf pan.

    Bake at 350 degrees for about 1 hour.

  • Rustic Peach Tart

    Rustic Peach Tart

    Peach Tart

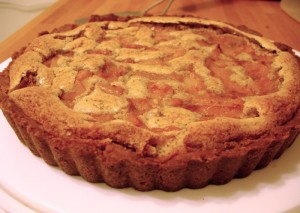
    So what could my mom do with her canned peaches? Everything or nothing, they were always great.  This tart is equally good with tart apples, pears, plums, or berries, apricots or yes – peaches.  Even combining fruits would be great.   The crust has an appealing cookie-like texture.  The almond cream  was amazingly smooth and flavorful.  Almond flavor is always good with fruit.  They combine well, and enhance each other.  I did add both rum and vanilla to flavor it.  I like food to look beautiful, but not fussed over, so rustic always is more appealing to me.  Adapted from Baking: From My Home to Yours Dorie Greenspan, but I am sure my Mother had a similar recipe.

    For the almond cream:

    6 tablespoons unsalted butter, at room temperature
    2/3 cup sugar
    3/4 cup ground blanched almonds
    2 teaspoons all-purpose flour
    1 teaspoon cornstarch
    1 large egg
    2 teaspoons dark rum
    1 teaspoon pure vanilla extract

    1 partially-baked 9-inch tart shell, made with Sweet Tart Dough (see below), at room temperature
    1 can of canned peach halves

    Confectioners’ sugar for dusting, or apple jelly for glazing

    To make the almond cream:  Put the butter and sugar in the workbowl of a food processor and process until the mixture is smooth and satiny.  Add the ground almonds and continue to process until well blended.  Add the flour and cornstarch, process, and then add the egg.  Process for about 15 seconds more, or until the almond cream is homogeneous.  Add the rum or vanilla and process just to blend.  If you prefer, you can make the cream in a mixer fitted with the whisk attachment or in a bowl with a rubber spatula.  In either case, the ingredients are added in the same order.  Scrape the almond cream into a container and either use it immediately or refrigerate it until firm, about 2 hours.

    Getting ready to bake:  Center a rack in the oven and preheat the oven to 350 degrees F.  Have a lined baking sheet at the ready.  Cut the peaches in half from blossom to stem (or pieces). Whatever fruit you have, make sure to pat them dry – really dry – so that their liquid won’t keep the almond cream from baking.

    Fill the baked crust with the almond cream, spreading it even with an offset metal icing spatula.  Thinly slice each pear half crosswise, lift each half on a spatula, press down on the pear to fan it slightly and place it, wide-end toward the edge of the crust, over the almond cream.  The halves will form spokes.

    Put the crust on the lined baking sheet, slide the sheet into the oven and bake the tart 50 to 60 minutes, or until the almond cream puffs up around the pears and browns.  Transfer the tart to a rack to cool to just warm or to room temperature before unmolding.

    Right before serving, dust the tart with confectioners’ sugar.  If you prefer, prepare a glaze by bringing about 1/4 cup apple jelly and1/2 teaspoon water to the boil.  Brush the glaze over the surface of the tart.

    Serving:  This tart goes very well with aromatic tea.

    Storing:  If it’s convenient for you, you can make the almond cream up to 2 days ahead and keep it closely covered in the refrigerator, or you can wrap it airtight and freeze it for up to 2 months; defrost before using.  You can also poach the pears up to 1 day ahead.  However, once you’ve baked the tart, you should be prepared to enjoy it that same day.

    Playing around:  The almond cream is a great companion for a variety of fruits.  It’s as good with summer fruits, like apricots or peaches, as it is with autumn’s apples.

    Sweet Tart Dough

    Adapted from Baking: From My Home to Yours

    1 1/2 cups all-purpose flour
    1/2 cup confectioners’ sugar
    1/4 teaspoon salt
    1 stick plus 1 tablespoon (4 1/2 ounces) very cold (or frozen) unsalted butter, cut into small pieces
    1 large egg yolk

    To make the dough:  Put the flour, confectioners’ sugar and salt in the workbowl of a food processor and pulse a couple of times to combine.  Scatter the pieces of butter over the dry ingredients and pulse until the butter is cut in coarsely – you’ll have pieces the size of oatmeal flakes and pea-size pieces and that’s just fine.  Stir the egg, just to break it up, and add it a little at a time, pulsing after each addition.  When the egg is in, process in long pulses – about 10 seconds each – until the dough, which will look granular soon after the egg is added, forms clumps and curds.  Just before your reaches this clumpy stage, the sound of the machine working the dough will change – heads up.  Turn the dough out onto a work surface.

    Very lightly and sparingly – make that very, very lightly and sparingly – knead the dough just to incorporate any dry ingredients that might have escaped mixing.

    If you want to press the dough into a tart pan, now is the time to do it.

    If you want to chill the dough and roll it out later (doable, but fussier than pressing), gather the dough into a ball (you might have to use a little more pressure than you used to mix in dry bits, because you do want the ball to be just this side of cohesive), flatten it into a disk, wrap it well and chill it for at least 2 hours or for up to 1 day.

    To make a press-in crust:  Butter the tart pan and press the dough evenly along the bottom and up the sides of the pan.  Don’t be stingy – you want a crust with a little heft because you want to be able to both taste and feel it.  Also, don’t be too heavy-handed – you want to press the crust in so that the pieces cling to one another and knit together when baked, but you don’t want to press so hard that the crust loses its crumbly shortbreadish texture.  Freeze the crust for at least 30 minutes, preferably longer, before baking.

    To make a rolled-out crust:  This dough is very soft – a combination of a substantial amount of butter and the use of confectioners’ sugar – so I find it is easier to roll it between wax paper or plastic wrap or, easiest of all, in a roll-out-your-dough slipcover.  If you use the slipcover, flour it lightly.  Roll the dough out evenly, turning the dough over frequently and lifting the wax paper or plastic wrap often, so that it doesn’t roll into the dough and form creases.  If you’ve got time, slide the rolled out dough into the fridge to rest and firm for about 20 minutes before fitting the dough into the buttered tart pan.  Trim the excess dough even with the edge of the pan.  Freeze the crust for at least 30 minutes, preferably longer, before baking.

    To partially bake the crust:  Center a rack in the oven and preheat the oven to 375 degrees F.  Butter the shiny side of a piece of aluminum foil and fit the foil tightly against the crust.  Bake the crust 25 minutes, then carefully remove the foil.  If the crust has puffed, press it down gently with the back of a spoon.  Bake for another 3 to 5 minutes, then transfer the crust to a cooling rack; keep it in its pan.

  • Chewy Popcorn Balls

    Chewy Popcorn Balls

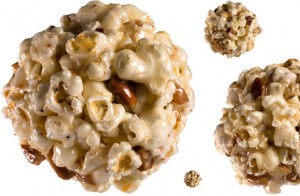
    Popcorn Balls with Mixed Nuts

    In preparation for Halloween night, my mom would gather us and we would make popcorn balls to hand out for goodies.

    1 cup sugar

    1 cup light corn syrup (or 1 cup maple syrup)

    1/2 tsp salt

    1/2 tsp cinnamon

    1/4 tsp ginger

    1/8 tsp mace or allspice

    1 T butter

    1/2 cup water

    1 tsp vanilla

    1/2 tsp almond extract

    3 quarts crisp salted popped corn

    1 1/2 cups chopped mixed nuts

    Combine sugars, salt spices, butter and water in saucepan,. Cook over low heat, stirring until sugar dissolves. Wash crystals from side of the pan. Cook over medium heat to 245 degrees on a candy thermometer – firm ball stage.  Remove from heat; stir in extracts. Pour slowly over mixture of popped corn and nuts, stirring to mix well. Sharpe iwth buttered hands, into balls.  Makes about 2 dozen balls, 2 inches in diameter.

    Variations:

    Holiday Popcorn Balls: add 1/2 candied cherries (red and green)  

    Crunchy Popcorn Balls:  The above recipe makes chewy popcorn balls.  If you want crunchy popcorn balls, use only 2 quarts of popcorn and heat the sugar mixture to 290 degrees.  Pour over popcorn and nuts, spread in thin layer on buttered aluminum foil and break into pieces when cooled.

    Popcorn on a Stick:  Form the popcorn balls on a stick.    You can even drizzle carmel and/or chocolate around them to make them even better! 

    Toffee Popcorn Balls:  Take your chewy popcorn balls and dip in the top third in milk chocolate topping and then sprinkle with broken heath bar!

    Fancy Dipped Popcorn Balls

    Snowman Popcorn Balls:   Make a smaller and set it on top of the larger ball to cool.  Decorate with a mint for a hat, and add different candies to decorate to look like a snowman.

  • Stuffed Portabello Mushrooms – Spinach, Ricotta and Mozzarella

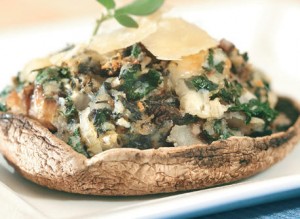
    Stuffed Portabello Mushrooms – Spinach, Ricotta and Mozzarella

    4 large Portobello mushrooms
    2/3 cup Ricotta cheese
    10 oz bag spinach, cooked, squeezed and chopped
    2 tbsp flour
    1 large garlic clove, minced
    1 medium onion, chopped
    1 cup monterrey jack or mozzarella cheese, grated or finely diced
    2 tbsp Parmesan cheese, grated
    2 tsp dried oregano

    Instructions
    Cut out mushroom stalks at cap. Reserve caps, chop stalks and mix to remaining ingredients in a large bowl. Season to taste. Place mushrooms on a baking sheet, underside up. Mound stuffing on mushrooms and smooth over. Cook in center of preheated oven at 400° F for 20 to 25 minutes until golden.

  • Aunt Nett’s Shrimp and Potato Salad

    Aunt Nett’s Shrimp and Potato Salad

    Ingredients:

    • 2 cups mayonnaise (Do NOT use fat free or low fat)
    • 1 (6 ounce) can shrimp, drained well and flaked (you can also use thawed frozen shrimp or freshly boil shrimp)
    • 2 celery ribs, minced fine
    • 20 green olives, minced fine
    • 6 hardboiled eggs, chopped
    • salt and pepper, to taste


    Boil potatoes whole. Do not over-cook potatoes or salad will be mushy. When potatoes are done drain right away, peel and let cool. Put in refrigerator to chill. When chilled completely, cut them up into medium sized cubes and put in a large bowl. Put back into fridge to keep chilled. Combine celery and olives into finely minced pieces. Add to potato mixture. Open can of shrimp and drain well. Rinse off shrimp in the can, and squeeze dry with can cover before removing from can. Flake shrimp well between fingers and add to potato and veggie mixture. Mix mayonnaise into salad and add salt and pepper to taste.  If you want to use dill, chop it finely and add it now.  Refrigerate until ready to eat.

    When ready to serve, place potato salad on a few leaves of lettuce, serve with cucumber wedges. Oor serve inside a hollowed out tomato or bell pepper or cucumber.

    Variations:.

    Try adding:

    1/2 cup diced bell peppers

    1/2 of a lg sweet onion, minced finely

    1/2 tsp yellow mustard

    1/4 cup dill pickle relish

    1 tsp chopped fresh dill

  • Moussaka – Eggplant Casserole

    Moussaka – Eggplant Casserole

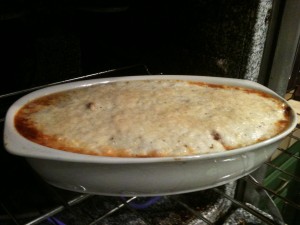
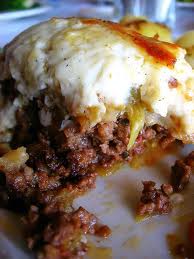
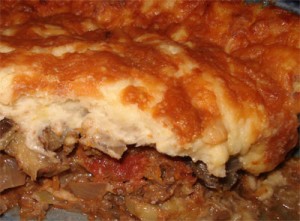
    Moussaka hot from the oven!

    Inspired by Bobby Flay’s Moussaka Throwdown, I had to give it a go. 

    Awesome Moussaka

    2 medium eggplants

    salt

    Meat Sauce:

    1 pound ground lamb (or you can use a mixture of beef and lamb)

    2 tablespoons butter

    2 tsp greek seasoning

    1 medium onion finely chopped

    1 clove garlic minced

    1 dash cinnamon

    1/4 tsp nutmeg

    1 T chopped parsley

    1/2  cup mashed Italian Roma Tomatoes

    1/4 cup red wine

    oil

    1/4 cup Romano Cheese or Parmesan, grated

  • Bechamel Sauce:
  • 1 cup salted butter (2 sticks)
  • 1 cup flour
  • 4 cups milk, warmed
  • 8 egg yolks, lightly beaten
  • Pinch of ground nutmeg 
  • Make the Béchamel Sauce:

    Melt butter over low heat. Using a whisk, add flour to melted butter whisking continuously to make a smooth paste. Allow the flour to cook for a minute but do not allow it to brown.

    Add warmed milk to mixture in a steady stream, whisking continuously.

    Simmer over low heat until it thickens a bit but does not boil.

    Remove from heat, and stir in beaten egg yolks and pinch of nutmeg. Return to heat and stir until sauce thickens.  Set aside and assemble the casserole. 

    Slice eggplant long way, thinly and salt. Lay on paper towel to absorb moisture. Prepare meat sauce, brown ground meet add spices, tomatoes, red wine and simmer 30 minutes.

    Rinse salted eggplant, pat dry, fry until golden in the oil.  Drain well on paper towels, patting to remove as much oil as possible.

    Hot from the oven.

    In 9×9 inch baking dish, place a layer of eggplant and top with meat sauce, and then sprinkle romano cheese on top. Continue layering ending in eggplant.  Top with Cheese Sauce.  Bake at 375 degree oven 45 – 60 minutes.  Let stand for 15 minutes before slicing into 3 inch squares.

    Variations:  You can also add potatoes and zucchini along with your eggplant. Cut them thinly, potatoes need to be boiled until fork tender and then can be layered in the casserole.

    I have seen this made with breaded eggplant and no breading.  Try it both ways and let me know which you like best.

    Eggplant Casserole – Greek Style
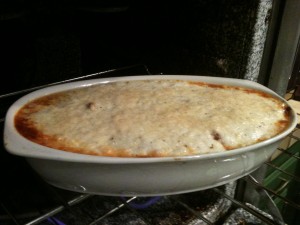
    Mousakka hot from the oven!