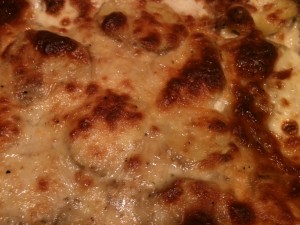
Chard, Onion & Gruyère Panade (Bread Casserole)

Ingredients:

Servings:

 8


Servings Size

  •  

    Update
  •  

    • 1 1/2 lbs thickly sliced yellow onions, a sweet variety if possible (about 6 cups)
    • 1/2 cup mild-tasting olive oil
    • 6 garlic cloves, thinly sliced
    • salt
    • 1 lb green swiss chard, thick ribs removed and cut into 1-inch-wide ribbons
    • water, as needed
    • 10 ounces day-old chewy peasant-style bread, cut into rough 1-inch cubes (8 to 10 cups)
    • 3 -4 cups chicken stock (or another flavourful stock) or 3 -4 cups vegetable stock (or another flavourful stock)
    • 6 ounces fontina (a combination works well) or 6 ounces gruyere (a combination works well) or 6 ounces another melting cheese, coarsely grated (a combination works well)Change Measurements: US | Metric

    Directions:

     Prep Time: 30 mins

    Total Time: 2 1/2 hrs

    1. 1 To prepare onions: Place the onions in a deep saucepan (or Dutch oven) and drizzle and toss with oil to coat, about 1/4 cup. Set over medium-high heat and, shimmying the pan occasionally, cook until the bottom layer of onions is slightly golden around the edges, about 3 minutes. Stir and repeat. Once the second layer of onions has colored, reduce heat to low and stir in garlic and a few pinches of salt. Stew, stirring occasionally, until the onions are a pale amber and tender but not mushy, about another 20 minutes. If at any point the onions dry, cover them to trap some moisture.
    2. 2 Preheat the oven to 325°F.
    3. 3 To prepare chard: Place a few handfuls of leaves in a large saute pan or skillet with a drizzle of oil, a sprinkling of water (if you’ve just washed the chard, it may have enough on the leaves), and a few pinches of salt. Set the pan over medium heat until the water begins to steam, then reduce the heat and stir and fold leaves until just wilted, 3 to 4 minutes. (Leaves should be uniformly bright green, the white veins pliable.
    4. 4 To prepare bread: Toss and massage the cubed bread with a few tablespoons of olive oil, a generous 1/4 cup of the stock and a few pinches of salt, to taste.
    5. 5 To prepare panade: Use a flameproof, 3-quart souffle dish or enameled cast-iron Dutch oven. Assemble the panade in layers, starting with a generous smear of onions, followed by a loose mosaic of bread cubes, a second layer of onions, a wrinkled blanket of chard, and a handful of the cheese. Repeat, starting with bread, the onions and so on, until the dish is brimming. Aim for 2 to 3 layers of each component, then make sure the top layer displays a little of everything. Irregularity in the layers makes the final product more interesting and lovely. Drizzle with any remaining olive oil.
    6. 6 Bring the remaining 3 3/4 cups stock to a simmer and taste for salt. Add stock slowly, in doses, around the edge of the dish. For a very juicy, soft panade, best served on its own, like a soup or risotto, add stock nearly to the rim; for a firm but succulent panade, nice as a side dish, fill to about 1 inch below the rim. Wait a minute for stock to be absorbed, then add more to return to the desired depth. The panade may rise a little as the bread swells.
    7. 7 Set panade over low heat and bring to a simmer; look for bubbles around the edges (heating it here saves at least 30 minutes of oven time).
    8. 8 Cover the top of the panade with parchment paper, then very loosely wrap the top and sides with foil. Place a separate sheet of foil under the panade or on the rack below it, to catch drips.
    9. 9 Bake until the panade is piping hot and bubbly. It will rise a little, lifting the foil with it. The top should be pale golden in the center and slightly darker on the edges. This usually takes about 1 1/2 hours, but varies according to shape and material of baking dish and oven.
    10. 10 Browning and serving: Uncover panade, raise temperature to 375°F, and leave until golden brown on top, 10 to 20 minutes. Slide a knife down the side of the dish and check the consistency of the panade. Beneath the crust, it should be very satiny and it should ooze liquid as you press against it with the blade of the knife. If it seems dry, add a few tablespoons simmering stock and bake for 10 more minutes.


    Posted in Uncategorized | Leave a comment

    Gratin or Panade or Savory Bread Pudding

    Potatoes Au Gratin

    P

    Posted in Uncategorized | Leave a comment

    Plum Tart

    The Italian Prune Plum is fairly small in size with a oval or egg shape. Its thin skin is smooth with a pretty blue, almost purplish color that is covered with a slivery grey bloom. Once you cut into its yellowy green dense flesh you will find it tastes sweet, yet with a hint of tanginess.

    Pate Brisee: In a food processor, place the flour, salt, and sugar and process until combined. Add the butter and process until the mixture resembles coarse meal (about 15 seconds). Pour 1/8 cup (30 ml) water in a slow, steady stream through the feed tube until the pastry just holds together when pinched. Add remaining water, if necessary. Do not process more than about 30 seconds. Turn the pastry out onto your work surface, gather it into a ball, cover with plastic wrap, and refrigerate for about one hour to chill the butter and allow the gluten in the flour to relax.

    Once the pastry has chilled sufficiently, remove from refrigerator and place on a lightly floured surface. Roll out the pastry to fit into a 9 inch (23 cm) tart pan. To prevent the pastry from sticking to the counter and to ensure uniform thickness, keep lifting up and turning the pastry a quarter turn as you roll (always roll from the center of the pastry outwards to get uniform thickness). To make sure it is the right size, take your tart pan, flip it over, and place it on the rolled out pastry. The pastry should be about an inch larger than your pan.

    When the pastry is rolled to the desired size, lightly roll the pastry around your rolling pin, dusting off any excess flour as you roll. Unroll onto the top of your tart pan. Never pull the pastry or you will get shrinkage (shrinkage is caused by too much pulling of the pastry when placing it in the pan). Gently lay in pan and with a small floured piece of pastry, lightly press pastry into bottom and up sides of pan. Roll your rolling pin over top of pan to get rid of excess pastry. With a thumb up movement, again press dough into pan. Roll your rolling pin over the top again to get rid of any extra pastry. Cover and place in the freezer until firm, several hours or even overnight.

    Preheat oven to 375 degrees F (190 degrees C) and place rack in center of oven.

    Plum Filling: With a sharp knife, cut the plums in half by following the natural crease in the plum’s skin. Then, holding one half of the plum, gently twist the other half. The plum should easily fall into two halves so the pit can be removed. then cut each half into thirds. Place the cut plums in a large bowl and gently toss with the sugar and pinch of salt.

    Remove the tart shell from the freezer and quickly place the plums, cut side up, in neat concentric circles in the frozen tart shell. Crowd the fruit, but do not overlap. Scrape any remaining sugar from the bowl and sprinkle over the plums. Bake the tart until the crust is golden brown and the fruit has sunken into itself, about 45-50 minutes.

    Serves 6 people.

    Sources:

    Glover, Brian. Fruit. Ryland Peters & Small. New York: 2006.

    Rodgers, Judy. The Zuni Cafe Cookbook. W. W. Norton & Company. New York: 2002.

    Pate Brisee (Short Crust Pastry):

    1 1/4 cups (175 grams) all-purpose flour

    1/2 teaspoon (2 grams) salt

    1 tablespoon (14 grams) granulated white sugar

    1/2 cup (1 stick) (113 grams) unsalted butter, chilled, and cut into 1 inch (2.54 cm) pieces

    1/8 to 1/4 cup (30 – 60 ml) ice water

    Filling:

    1 pound (454 grams) prune plums

    1/4 cup (50 grams) granulated white sugar

    1/8 teaspoon salt

    Read more: http://www.joyofbaking.com/PrunePlumTart.html#ixzz0mvTZVlQi

    Posted in Uncategorized | Leave a comment

    Bihari Green Beans Masala

    Bihari Green Beans Masala
    Serves 2 as a main course with rice

    2 tablespoons vegetable oil or light olive oil
    2 tablespoons sliced almonds
    1/2 cup finely chopped onion
    3 large cloves garlic, finely chopped
    1 teaspoon ground cumin
    1 teaspoon ground coriander
    1 teaspoon sweet paprika
    1/2 teaspoon red chili pepper flakes
    3/4 teaspoon kosher salt
    3/4 cup coconut milk
    3/4 pound green beans, trimmed and cut into 1-inch pieces
    1 teaspoon lime juice
    2 tablespoons chopped cilantro

    1. Heat the oil in a 3-quart sauté pan over medium heat. Add almonds and cook, stirring, until light golden. Remove from heat and transfer almonds to a plate or bowl; set aside for garnish.

    2. Add onion, garlic, cumin, coriander, paprika, chili pepper flakes and salt to the unwashed sauté pan, and return to medium heat. Sauté until the onion is tender and begins to fry, about 4 minutes.

    3. Add coconut milk and green beans. Mix well and bring to a boil. Reduce heat to medium-low and cook, covered, until the beans are tender, about 6 minutes.

    4. Sprinkle beans with lime juice, and toss lightly. Transfer to a warmed serving dish and garnish with almonds and cilantro. Serve with plain cooked rice or roti flatbread.

    Option: You can also replace the green beans with califlower.

    Posted in Uncategorized | Leave a comment

    Slow Roasted Porchetta

    It is difficult to find pork shoulders that have not been trimmed of the fat and skin in regular grocery stores, but if you live near an Asian market you should be able to find one there. Otherwise, ask your butcher if they can special order you one.

    Porchetta Serves 8 – 10

    1 – 4 pound pork shoulder with the skin and fat cap attached.
    Kosher salt and fresh cracked pepper
    1 teaspoon dry rosemary
    1/2 teaspoon dry thyme
    1/4 teaspoon dry sage
    1/2 teaspoon crushed red pepper flakes
    1/4 teaspoon dry oregano
    1 tablespoon olive oil
    Butcher’s twine

    Heat your rotisserie to 350 F, or heat your oven to 350 F and place a rack over a roasting pan covered in foil. In a small bowl combine the rosemary, thyme, sage, red pepper flakes, oregano, and olive oil until it forms a paste. Set aside.
    On a cutting board butterfly the pork shoulder. Spread the herb paste over the meat and then fold the meat back in.

    Use the butchers twine to truss the roast and place on the roasting spit, or on the rack, skin side up, on the prepared pan. Roast until the meat reaches at least 180 F and the skin on top of the fat cap is hard when tapped, about 3 1/2 to 4 hours.

    Allow to rest ten minutes. Once rested gently pull the skin off the fat cap (it should easily release) and chop into small pieces. Slice off the remaining fat, then slice the meat. Serve the meat garnished with the crunchy skin. Enjoy!

    Serve with Roasted Potato Bites.

    Posted in Uncategorized | Leave a comment

    Toffee Bars

    Toffee Bars look innocent enough. That is, until you bite into one. I find it hard to resist the combination of toasted almonds, dark chocolate, and buttery brown sugar shortbread. Toffee Bars look, and even taste remarkably like Buttercrunch Toffee. So when the urge for toffee hits, yet you do not want to bother with the boiling of sugar syrup, try these Toffee Bars. You will not be disappointed.

    Like most bars and squares, Toffee Bars are easy to make and would be perfect for holiday baking as they will keep for several weeks in an airtight container. They start with a shortbread base, and while they contain the usual shortbread components, butter, sugar, vanilla, and flour, the technique for mixing these ingredients is unique. Instead of creaming the butter with the sugar, for this shortbread the butter is melted. The rest of the ingredients are then mixed in by hand, one by one, until you have a soft batter. This technique results in a shortbread with a texture that is light, crisp and crunchy. Combine that with the flavor of brown sugar and you have a shortbread that emulates the texture and taste of toffee. The shortbread is baked until golden brown and set. Immediately upon removing from the oven, chocolate is placed on the hot shortbread. You can use either your favorite dark chocolate or semi-sweet chocolate chips. Once the chocolate has completely melted, toasted and chopped almonds are sprinkled on top. You can leave the bars to set at room temperature or, to speed the process along, you can place them in the refrigerator until the chocolate hardens. As with most things chocolate, these do benefit from sitting overnight so the flavors have time to mingle and soften. The bars will keep at room temperature, in a covered container, for several weeks, although I have never been able to keep them that long.
    This Toffee Bar recipe comes from one of my favorite cookbooks, Cookies and Brownies by Alice Medrich.

    Shortbread: Preheat oven to 350 degrees F (177 degrees C) and place oven rack in the center of the oven. Line the bottom and sides of an 8 inch (20 cm) square baking pan with aluminum foil.

    Melt the butter in a medium sized saucepan. Remove from heat and stir in the sugar and vanilla extract. Then add the salt and flour and mix just until incorporated. Spread the shortbread evenly on the bottom of the prepared pan and bake for about 20 to 25 minutes or until the shortbread is golden brown with well browned edges.

    Remove from oven and immediately scatter the chopped chocolate over the hot shortbread. Return the shortbread to the oven for a minute or two or just until the chocolate softens. Remove from oven and, with an offset spatula or back of a spoon, evenly spread the chocolate. Sprinkle the chopped almonds over the chocolate. Place the pan on a wire rack to cool.

    Once the chocolate has set, lift the shortbread from the pan using the edges of the foil. Place on a cutting board and, with a sharp knife, cut into 16 squares.

    Store in an airtight container. These will keep for several weeks at room temperature.

    Makes about 16 squares.

    Note: To toast the almonds. Place the almonds on a baking sheet and bake in a 350 degree F (177 degree C) oven for about 8 minutes, or until lightly browned. Let the nuts cool completely and then chop.

    Source:

    Medrich, Alice. Cookies and Brownies. Warner Books. New York: 1999.

    Shortbread:

    1/2 cup (113 grams) unsalted butter, cut into pieces

    1/2 cup (110 grams) light brown sugar

    1 teaspoon pure vanilla extract

    1/4 teaspoon salt

    1 cup (130 grams) all purpose flour

    Topping:

    6 ounces (175 grams) semi sweet chocolate, chopped (can use 1 cup (175 grams) semi-sweet chocolate chips)

    1/2 cup (50 grams) almonds, toasted and chopped

    Read more: http://www.joyofbaking.com/barsandsquares/ToffeeBars.html#ixzz0mvWxln8H

    Posted in Uncategorized | Leave a comment

    Toffee

    A good piece of Toffee should be savored. Savor its smooth and buttery caramel flavor, its crunchy texture, and its lovely coating of chocolate and toasted almonds. You may know this Toffee as Butter Toffee, or Buttercrunch Toffee, or even as English Toffee. This Toffee is highly addictive and it is almost impossible to eat just one piece. It makes a wonderful gift, packed in pretty gift tins or party bags tied with decorative ribbons.

    So let’s talk about the problems that often occur with candy making. One problem is humidity so do not make toffee on a humid day. Second, use a heavy bottomed saucepan so the sugar syrup will not scorch under high temperatures. Also, buy a good mercury candy thermometer with a metal clip so you can fasten it to the side of the pan. When using a candy thermometer make sure the bulb of the thermometer does not rest on the bottom of the pan as this can cause an inaccurate temperature reading. It is also important to read the temperature at eye level and you may have to wipe the steam off the thermometer first in order to read the numbers. If you think your candy thermometer may be inaccurate, you can test its’ accuracy by placing it in a saucepan of boiling water. The temperature should read 212 degrees F (100 degrees C). If you find your thermometer is off by a degree or two, simply adjust your recipe to take this into account. Another thing about candy thermometers are that they are fragile so after each use place in hot water (not cold) to dissolve the sugar coating. Never place a hot thermometer into cold water as this can cause it to break. And be sure to store your thermometer away from other kitchen utensils so it won’t get banged around. Lastly, cleaning the saucepan can be a problem. The best way to remove all that hard caramelized sugar is to fill the saucepan with water and bring it to a boil. Turn off the heat and let it sit until the sugar dissolves.
    Now let’s talk about how to prevent your toffee from becoming grainy. Sugar crystallization is the biggest problem in candy making as it will turn a smooth sugar syrup into a grainy mess. This is caused by the formation of sugar crystals which can start a chain reaction of crystallization (the process of sugar particles clinging together) that makes the mixture grainy. So, to prevent this from happening, stir the butter, sugar, water, and corn syrup until they start to boil as this ensures that the sugar has completely melted. Then, stop stirring. Brush down any sugar crystals clinging to the sides of the saucepan with a pastry brush dipped in water. Then clamp a candy thermometer to the side of the saucepan, and do not stir the mixture as it cooks, as introducing a wooden spoon to the mixture as it boils can cause crystallization. Once the toffee reaches the hard crack stage (300 degrees F) (149 degrees C), remove it from the heat, and immediately stir in the vanilla extract and chopped almonds. Then quickly and evenly pour the toffee into your prepared pan. Place the coarsely chopped chocolate, either semi sweet or milk, over the hot toffee. After a few minutes the chocolate will be soft enough to spread with an offset spatula in an even layer over the toffee. Sprinkle the remaining finely chopped almonds over the melted chocolate. Toffee will keep for about 7 to 10 days at room temperature, but make sure to store it in an airtight container to prevent softening. This toffee can also be frozen for about a month.

    Toffee: Preheat oven to 350 degrees F (177 degrees C). Place almonds on a baking sheet and bake them for 8-10 minutes, or until lightly browned and fragrant. Once the nuts have cooled to room temperature, roughly chop one cup of the almonds. Set aside. Take the remaining cup of almonds and place in a food processor, fitted with a metal blade. Pulse the almonds until they are finely chopped. Set aside.

    Butter an 11 x 17 inch (28 x 43 cm) baking sheet. Place the prepared baking sheet on a cooling rack.

    Melt the butter in a large heavy saucepan over medium to medium-high heat. Once the butter has melted (do not let it brown), stir in the sugar, water and corn syrup. Stir until the sugar has completely dissolved. Once the mixture boils, immediately stop stirring. Brush down any sugar crystals clinging to the sides of the saucepan with a pastry brush dipped in water. Clamp a candy thermometer to the side of the saucepan and cook, without stirring, until the mixture reaches the hard crack stage (300 degrees F) (149 degrees C). This will take about 15 minutes. (If you find the sugar syrup browning unevenly, swirl the saucepan from time to time.)

    Immediately remove the saucepan from the heat and stir in the vanilla extract and the one cup (85 grams) of roughly chopped almonds. Quickly pour the toffee in an even layer on the prepared baking sheet. Carefully place the chopped chocolate over the hot toffee. After a few minutes the chocolate will be soft enough to spread with an offset spatula in an even layer over the toffee. Sprinkle the remaining one cup (85 grams) of finely chopped almonds over the melted chocolate.

    Cool completely, either at room temperature or in the refrigerator, and then cut or break into irregular pieces.

    Store the toffee, in an airtight container at room temperature, for about 7-10 days. It can also be frozen for about a month,.

    Makes about 2 – 2 1/2 pounds (900 – 1025 grams).

    Source:

    Scharffenberger, John & Steinberg, Robert. The Essence of Chocolate. Hyperion. New York: 2006.

    Weinstein, Bruce. The Ultimate Candy Book. William Morrow. New York: 2000.

    Toffee:
    2 cups (170 grams) slivered almonds

    1 1/2 cups (3 sticks) (340 grams) unsalted butter

    2 cups (400 grams) granulated white sugar

    1/4 cup (60 ml) water

    3 tablespoons light corn syrup

    1 teaspoon pure vanilla extract

    6 ounces (170 grams) milk or semisweet chocolate, coarsely chopped

    Read more: http://www.joyofbaking.com/candy/Toffee.html#ixzz0mvWJdez0

    Posted in Uncategorized | Leave a comment

    Strawberry Vinegarette

    Strawberry Vinaigrette Dressing
    Provided By DeeDee Grooms of Plant City, FL
    Makes about 6 (8 oz) half pints

    You will need:
    5 quarts (25 cups) fresh whole strawberries, washed and stemmed
    1 quart (4 cups) white distilled vinegar
    Sugar
    6 Ball® Collection Elite® Platinum (8 oz) Jars

    Directions:
    1.) PLACE strawberries in a large stainless steel saucepot or plastic container.
    2.) POUR vinegar over strawberries. Cover container tightly with plastic wrap and let stand overnight in a dark, cool place (70°F to 75°F).
    3.) PREPARE boiling water canner. Heat jars and lids in simmering water until ready for use. Do not boil. Set bands aside.
    4.) STRAIN liquid from strawberries, collecting in a large liquid measure. Liquid should be red and clear (no pulp). Measure liquid.
    5.) PLACE strawberry vinegar in a clean, large stainless steel saucepan. Add an equal amount of sugar, stirring to combine. Bring mixture just to a boil. Remove from heat and skim foam if necessary.
    6.) LADLE hot vinaigrette into hot jars leaving 1/4 inch headspace. Wipe rim. Center lid on jar. Apply band until fit is fingertip tight.
    7.) PROCESS jars in a boiling water canner for 10 minutes, adjusting for altitude. Remove jars and cool. Check lids for seal after 24 hours. Lid should not flex up and down when center is pressed.

    Strawberry Romaine Salad
    Provided By DeeDee Grooms of Plant City, FL
    Makes about 8 servings
    2 large heads romaine lettuce
    1 to 2 pints (about 2-1/2 – 5 cups) strawberries, hulled and sliced
    1 cup grated Monterey jack cheese
    1/2 cup toasted chopped walnuts, optional
    Strawberry Vinaigrette Dressing (see recipe above)

    Note: If you don’t have Strawberry Vinaigrette Dressing on hand, DeeDee recommends the following recipe.
    1 cup vegetable oil
    3/4 cup sugar
    1/2 cup red wine vinegar
    2 cloves garlic, minced
    1/2 tsp paprika
    1/2 tsp salt
    1/4 tsp white pepper
    1 Ball® Quart Glass Preserving Jar with lid and band

    1.) WASH romaine lettuce and dry. Tear into pieces. Place into clear salad bowl.
    2.) ADD sliced strawberries on top of romaine lettuce. Sprinkle with cheese and chopped walnuts.
    3.) DRIZZLE with Strawberry Vinaigrette Dressing just before serving.
    OR
    COMBINE oil, sugar, vinegar, garlic, paprika, salt and pepper in jar. Apply lid and band. Shake until thickened. Drizzle over salad just before serving.

    Posted in Uncategorized | Leave a comment

    Fried Pickle Chips

    I just tried these about 6 months ago at a local beach deli. I love them.

    Fried pickles
    2 cups dill pickle chips
    1 cup flour
    1/2 teaspoon salt plus more to taste
    1 teaspoon black pepper plus more to taste
    1 egg
    1/2 cup buttermilk
    2 cups finely crushed saltines
    1/2 teaspoon cayenne
    1/2 teaspoon dried dill weed
    Salt to taste
    Oil for frying

    In a large plastic food-storage bag, mix together the flour, salt and black pepper. Place the pickle chips in the bag and shake until they are well coated.

    Mix together the eggs with the buttermilk. Place the crushed saltines on a plate and mix in the cayenne and dill weed. In batches, dip the flour-coated pickles into the eggs and then lightly dredge in the saltines. Place cracker-coated pickles on a large plate or sheet. Repeat until all the pickles are coated.

    In a large, heavy skillet heat 1/2 inch of oil on medium heat until it reaches 350 degrees. Cook the pickles for one minute or until golden brown, turning once. Depending on the size of your skillet will probably have to do in several batches. Drain on paper towels.

    Serve immediately with your favorite buttermilk dressing.

    OR if you want to add the cayenne to the buttermilk dressing and serve a spicy version of buttermilk dressing, go for it.

    Posted in Uncategorized | Leave a comment

    Cinnamon Toast

    But most crucial for our purposes, I found a recipe for something called Cinnamon Toast. I know you’re sitting there like, Riiiight. Cinnamon toast. Tell me something I haven’t heard, but bear with me, because this is different. It’s not bread that you toast and then butter and sprinkle with cinnamon sugar. It’s bread that you cut into triangles, generously coat on both sides with melted butter, dredge in cinnamon sugar, and then bake until crisp. You can keep them in a tin on the counter, where they actually get better with a day or two of age, and you eat them like cookies. I don’t know where the recipe originally came from, but it was written in what I think is my aunt Millicent’s handwriting. My mother tells me that she also has it, and that she’s had it for years. She used to make it all the time, she says, particularly when she was having a morning meeting and wanted something to serve with coffee. I don’t remember ever eating it, and to be frank, I sort of had a hard time believing it could be worth a real, written recipe. I mean, it’s CINNAMON TOAST. But I tried it yesterday, and I was wrong. Nanny, Mom, Millicent, I was wrong. I was so wrong. Next, I’m making Nibbler.

    You should try this recipe. I’ve never had anything quite like it. The premise is simple, and so are the ingredients, but it sort of defies categorization. The bread gets crisp and crunchy, and the butter gives it some richness, and the cinnamon sugar caramelizes lightly, going almost lacy at the edges. My mother says it’s “like cinnamon candy,” but to me, the overall experience is closer to a snickerdoodle cookie. Only easier, and faster, and crunchier. Which is to say, I like it even better.

    Cinnamon Toasts

    This recipe in its original form calls for dipping the bread in butter. On both sides. I tried it, and the bread got so saturated that it sort of terrified me. There was a LOT of butter in that little piece of bread. I found that brushing on the butter is a more moderate, palatable approach, and it still works very well. Either way, you’re going to use quite a bit of butter, and please don’t freak out about that. If it helps, keep reminding yourself that this is not breakfast; this is a cookie. Make it your mantra.

    Also, the original version of the recipe calls specifically for Pepperidge Farm white bread. My grocery store didn’t have any, so I used Franz brand “Milk and Honey” bread instead. Whatever brand you use, make sure that it’s not too squishy and spongy. The quantities of butter and cinnamon sugar listed below should be pretty close to perfect for six slices of sandwich bread, but if you have extra butter or sugar, just use more bread.

    1 stick (4 oz.) unsalted butter, cubed
    6 slices white sandwich bread, or more as needed
    ½ cup sugar
    2 tsp. ground cinnamon

    Preheat the oven to 325°F. If you want, line a baking sheet with parchment or aluminum foil. It makes cleanup easier.

    Put the butter into a pie plate or similar baking dish. Slide the dish into the oven, and keep an eye on it. You’re looking for the butter to melt completely.

    Stack the slices of bread, and then cut them diagonally into quarters. You should have 24 triangles.

    In a small bowl, whisk together the sugar and cinnamon. Turn the cinnamon sugar out onto a dinner plate, or another pie plate.

    When the butter is melted, remove it from the oven, and brush it onto both sides of a triangle of bread. Don’t be shy: apply the butter generously, so no spot is left uncoated. The bread should feel a little heavy in your hand. Dip the bread into the cinnamon sugar, taking care to coat both sides. Lay it on the prepared baking sheet. Repeat with remaining pieces of bread.

    Bake the toasts for about 25 minutes, until lightly browned. Transfer to a rack. The toasts will crisp as they cool. When cooled, store in an airtight container at room temperature.

    Note: These taste best with a little age. When I tasted them on the day they were made, they were just okay, but by the next day, the flavors had come together nicely.

    Yield: 24 pieces

    Posted in Uncategorized | Leave a comment