

Spring Mix Greens
Cucumber peeled and sliced
Lime Ceviche Shrimp from Costco - this is so good!
Avocado
Olive oil
White Balsalmic Vinegar
Arrange on your plate, drizzle lightly with olive oil and balsalmic.
Grab your fork!
Salt and Pepper to...


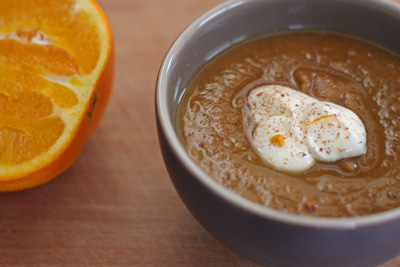
[caption id=“attachment_1508” align=“alignleft” width=“640” caption=“Serving the office "Soup of the Day!"”] [/caption]
2 Cans Pumpkin
2 Cans water (measure using the pumpkin cans)or Chicken Broth
2 Cans unsweetened Coconut Milk
1 Can...

Came home yesterday and all the meatloaf was gone! I had my mind set on a meatloaf sandwich.
A bit of mayonnaise on fresh Sheepherder’s White Bread, dill pickle slice and you have a very fulfilling sandwich - a manwich.Â
If your guy is anything...


Soup, made ahead, can be fast food.ÂÂJust put what want to save for later into jars, and either refrigerate or freeze. Don’t be afraid to make a lot. Soup gets better with age. A good side dish to this soup is fried Keilbasa polish sausage.Â

- ...


[caption id=“attachment_751” align=“alignleft” width=“280” caption=“Tuscan White Bean Bruschetta”] [/caption]

- White Bean Bruschetta
1 cup canned cannelinni white beans
1/4 tsp ground sage
2 T olive oil
12 slices of bruschetta
24 arugula leeaves,...

Most of us know the pleasures of cooking with wine â” and not just sipping a glass of something while standing at the stove, if you like to do this you might also want to check this freestanding wine cooler uk seller so you can properly store your...


I guess when it is a bit cold outside, immediately I reach for comfort food. We had meatloaf as a kid once a week. It was easy fast, feed the crowd and my mom could stretch the meat by adding rolled oats, potato chips, day old bread crumbs,...


My nephew, Mikey (nicknamed Lil’ Chief) makes a great eggroll, with just three

[caption id=“attachment_165” align=“alignleft” width=“640” caption=“Mango Plum Jam - Perfect Tartness”] [/caption]


Make your spouse feel like he is on vacation. Serve him this breakfast on a weekend, and he will adore you.